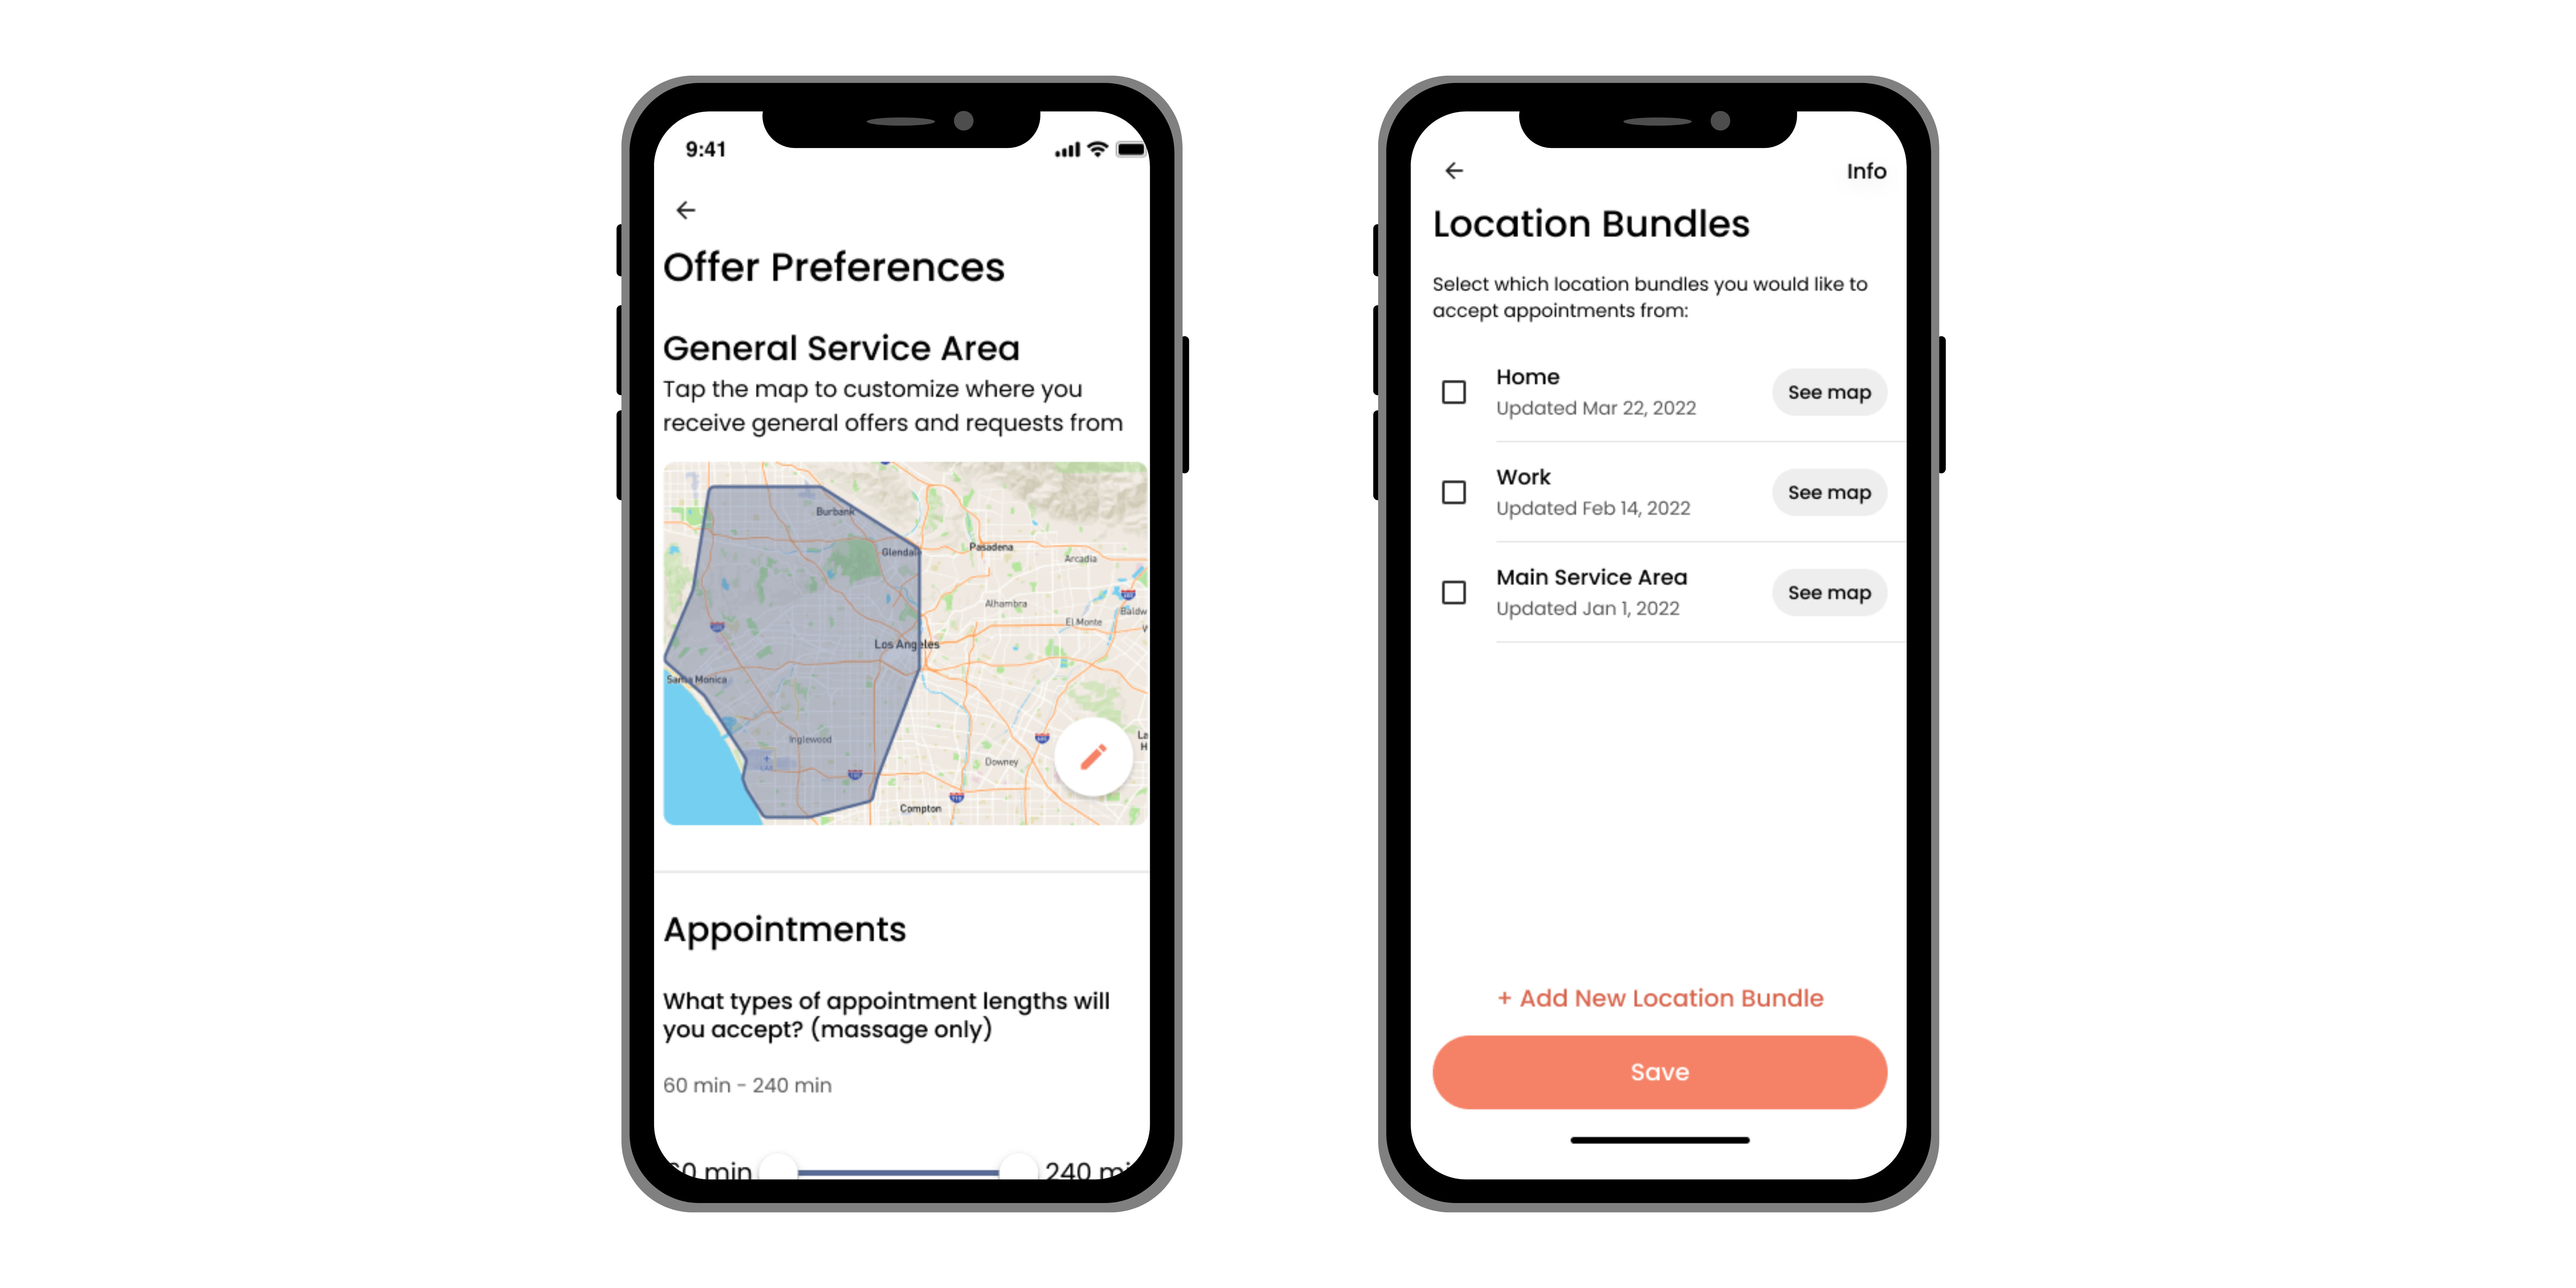
Maximizing Your Offers: Setting Up Location Bundles
To ensure you receive appointment offers in locations convenient to you, follow these steps to set up and customize your preferred service areas in the Soothe Provider App:
-
Log into the Soothe Provider App: Open the app and enter your credentials to access your account.
-
Navigate to Offer Preferences:
-
Open the menu: Locate and tap on the menu icon
-
Select "Offer Preferences" from the menu options.
- Set Up Your General Service Area:
- Within Offer Preferences, find the section for "General Service Area."
- Locate the next to this section and tap on it to proceed.
- Customize Your Location Bundle:
- Tap on "Add Location Bundle" to begin customizing your preferred locations.
- A map interface will appear where you can specify your service area.
- Use your finger to draw a circle directly on the map around the area(s) where you wish to accept appointment offers.
- Lift your finger to allow the circle to automatically connect and finalize your selection.
- Save Your Preferences:
- After outlining your preferred service area on the map, tap on "Save" to confirm your settings.
- Your chosen locations will now be saved as your preferred service areas for receiving appointment offers.

Instant Confirm
We recommend setting up Instant Confirm, which automatically assigns appointments to you based on your preferred schedule.
Creating Location Bundles for Instant Confirm
- Access Account Settings:
- Open the Soothe Provider App and navigate to the Menu.
- Select "Account" from the menu options to access your account settings.
- Navigate to Instant Confirm Settings:
- Within Account settings, locate and select "Offer settings."
- Choose "Instant Confirm" from the options provided.
3.Set Appointment Preferences:
- Configure your appointment preferences under Instant Confirm settings.
- This includes specifying your availability, preferred service areas, and any other relevant scheduling details.
- Create Location Bundles:
- After setting your preferences, proceed to create multiple location bundles.
- Each bundle allows you to define specific areas where you are willing to accept appointments automatically.
- Use the map interface to draw circles or select regions that represent your preferred service locations.
- Label Bundles for Clarity:
- Assign descriptive labels to each location bundle.
- This helps you easily identify and select the appropriate bundle based on your current availability and preferences.
- Save Your Preferences:
- Once you have created and labeled your location bundles, save your preferences.
- This ensures that your settings are applied and ready to automatically assign appointments based on your configured parameters.
To view our Instructional video, scroll down to the bottom of this article and select the video attachment.
Tips
- To help maximize your offers, only create one circle per each location bundle.
- Adjust as Needed: You can revisit these settings anytime to add, edit, or remove locations based on your availability and preferences.
- Optimize Offers: Setting specific service areas helps maximize your opportunities to receive relevant appointment offers.
- Stay Updated: Keep your preferences up-to-date to ensure you're receiving offers in the locations most convenient for you.